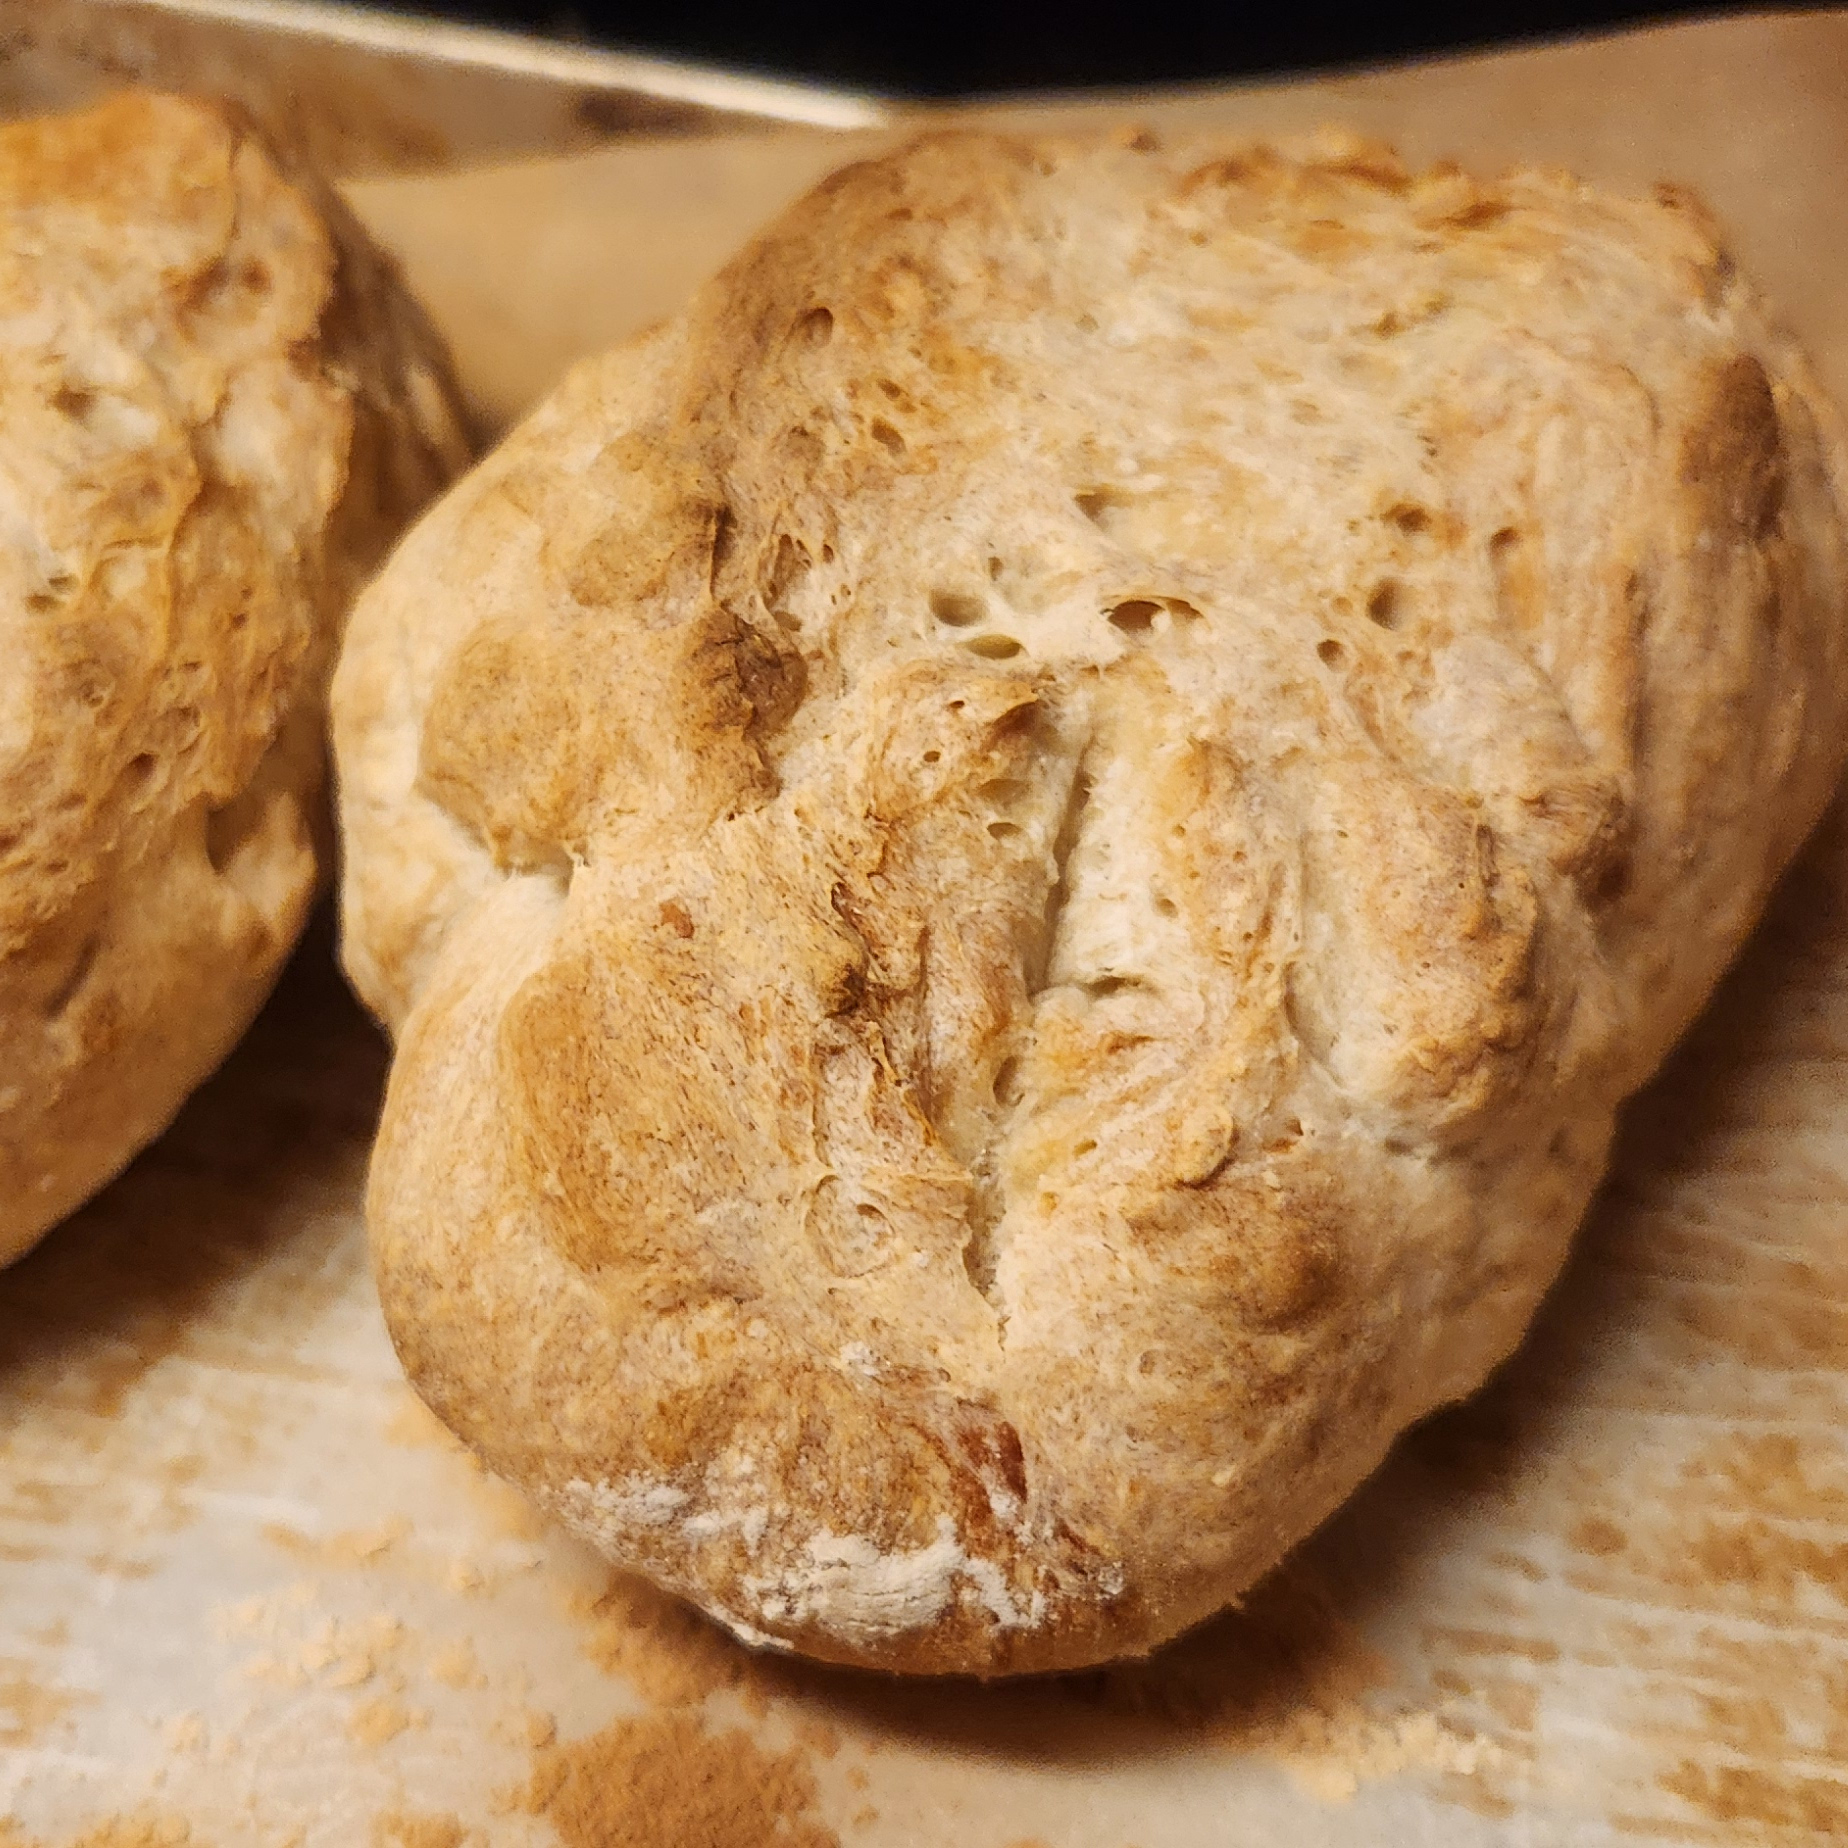
Artisan Bread
A crunchy yet soft loaf of bread, perfect for any situation
Ingredients:
- 430g Bread Flour
- 6g Instant Yeast
- 9g Course Salt
- 360g Water
Steps
-
Mix the dough
- Whisk flour, yeast, and salt in a large bowl
- Pour in the water and mix with a spoon
- Work the dough until it is just barely dry
-
Rise
- Cover the dough with plastic wrap and a towel
- Let rise for 2-3 hours. The dough will double in size
-
Prepare to Bake
- Preheat the oven to 475 ⁰F
- Cut the dough in half with a sharp knife
- Begin to work the dough, rolling out into footlong tubes
- Place on a floured baking sheet
- Score the bread with slashes down the middle about ½" deep
-
Bake
- PLace into oven
- Bake for 20-25 minutes until the crust is golden brown
- Remove from oven and let cool for at least 20 minutes
- Enjoy!

Bacon Egg and Cheese Breakfast Tacos
The simplest, fastest, and most straight-forward recipe in this cookbook. It's something anyone can figure out, right? Wrong. I know a trick or too for bacon and eggs that will take your breakfast tacos to the next level! This is a super dish. It works for breakfast, lunch, brunch, dinner, midnight snack - whenever. It might be the best recipe here, even if its the simplest.
Ingredients:
- 3x Strips of Bacon
- 3x Eggs
- 3x Tortillas
- 1 handful of Shredded Mexican Cheese
- 2 tbsp Avacado Oil
- 1 tspn Salt
- 1 tspn Pepper
- ¼ tspn MSG
- 1 glob Hot Sauce. Melinda's Ghost Pepper recommended
Steps
-
Start Cooking Bacon
- Begin heating a frying pan at medium-high heat. Cover with parchment paper. This will catch the grease from the bacon, so it's easier to dispose of!
- Place strips of Bacon onto the parchment paper.
- Lightly pepper the bacon (no salt) and add a pinch of MSG
- Cook until you see the bacon begin to brown on the under side (about 8 min).
- Flip the bacon. Let it cook until both sides brown. About 6 more min.
- Let bacon sit on a paper towel for about 2 min.
-
Heat Tortillas (while Bacon cooking)
In a clean pan (or directly over the flame if you have a gas stove), heat tortillas on each side. Don't use a microwave because it just won't taste as good.
Distribute the cheese amongst each taco to let it melt. -
Scramble Eggs (while Bacon cooking)
Eggs are crucial, so do NOT use what you think is best. Trust the recipe. If you listen to nothing else I say, listen to how to do these eggs. These are THE best way to make eggs for breakfast tacos! I promise you.- Begin heating a small pan to high temperature.
- Crack your 3 eggs into a bowl or plate with rim.
- Scramble well.
- Season with the tspns of salt, pepper, and MSG, and stir well.
- Once the pan is heated, poor the tbspns of Avacado oil in and let it begin to simmer and glisten.
- Poor your eggs in. They will quickly begin to fry and bubble. Use a spatula to stir them and scramble them.
- Once the eggs have finished cooking, you will have perfect, thick, fluffy eggs to make up the substantive part of the breakfast taco. A breakfast taco makes or breaks at this step.
- Distribute the eggs among the three tortillas equally.
-
Assemble the Tacos
- Dash a bit of hot sauce on each of the three currently-just-egg-and-cheese tacos you've made.
- Split each strip of bacon in half and throw 2 half-strips into each taco.
- Enjoy!

Fettucine Alfredo with Steak
A pasta dish with a homemade alfredo sauce certain to impress your friends and family.
Ingredients:
- 1 and 1 tbsp Olive Oil
- 2 cups Spinach
- 1 tspn Dried Parsely
- ½ tspn Dried Basil
- ½ tspn Onion Powder
- ¼ tspn Salt
- ¼ tspn Dried Oregano
- ¼ tspn Thyme
- ¼ tspn Ground Sage
- ½ cup Sherry Wine
- 3 tbsp Salted Butter
- 2 tbsp Minced Shallots
- 1 clove Minced Garlic
- 2 tbsp Flour
- 1 cup Heavy Cream
- 1 cup Chicken Broth
- 1 tspn Worcestershire sauce
- 1 tspn Dijon Mustard
- ¾ cup Grated Parmesan Cheese
- ¾ lb Fettucine
- 1 Prime Ribeye
Steps
-
Cook the Spinach
- Heat 1 tbsp olive oil in a larg skillet over medium-high heat and let warm
- Add the spinach and sprinkle some salt
- Sauté for a few minuts, until the spinach is wilted
- Set aside the Spinach for later
-
Cook the Steak
- Follow along my steak recipe
- After waiting the 5 minutes at the end of cooking the steak, slice and dice the steak into small chunks to be mixed with the pasta
- Leave steaks wrapped in foil or in oven at a low temp to keep warm while you cook the rest
-
Make the Alfredo Sauce and Pasta
- Combine the heavy cream, chicken broth, Worcester sauce, Dijon, parsely, basil, onion powder, salt, dried oregano, thyme, and sage in a small bowl and set aside
- Begin boiling a pot of water for the pasta. When a boil is reached, add in a bit of salt, based on box (½ tbsp course salt, for instance)
- Dab away most excess oil from the skillet, but leave behind brown bits
- Add wine, garlic, and shallots to the skillet
- Set heat to medium and scrape and stir for 3-4 minutes
- Drain away half of the liquid.
- Melt the butter and add the flour and cook until it begins to brown (about 2 minutes)
- Add the heavy-cream and seasoning mixture
- Bring sauce to a boil then reduce to simmer
- Simmer partially covered while you cook the pasta al dente based on the box
- Reduce heat of sauce to low and gradually stir in parmesan
- Use tongs to add the pasta gradually and toss to combine
-
Combine
- Add the spinach, followed by the steak
- Heat for a few more minutes partially covered
- Enjoy!
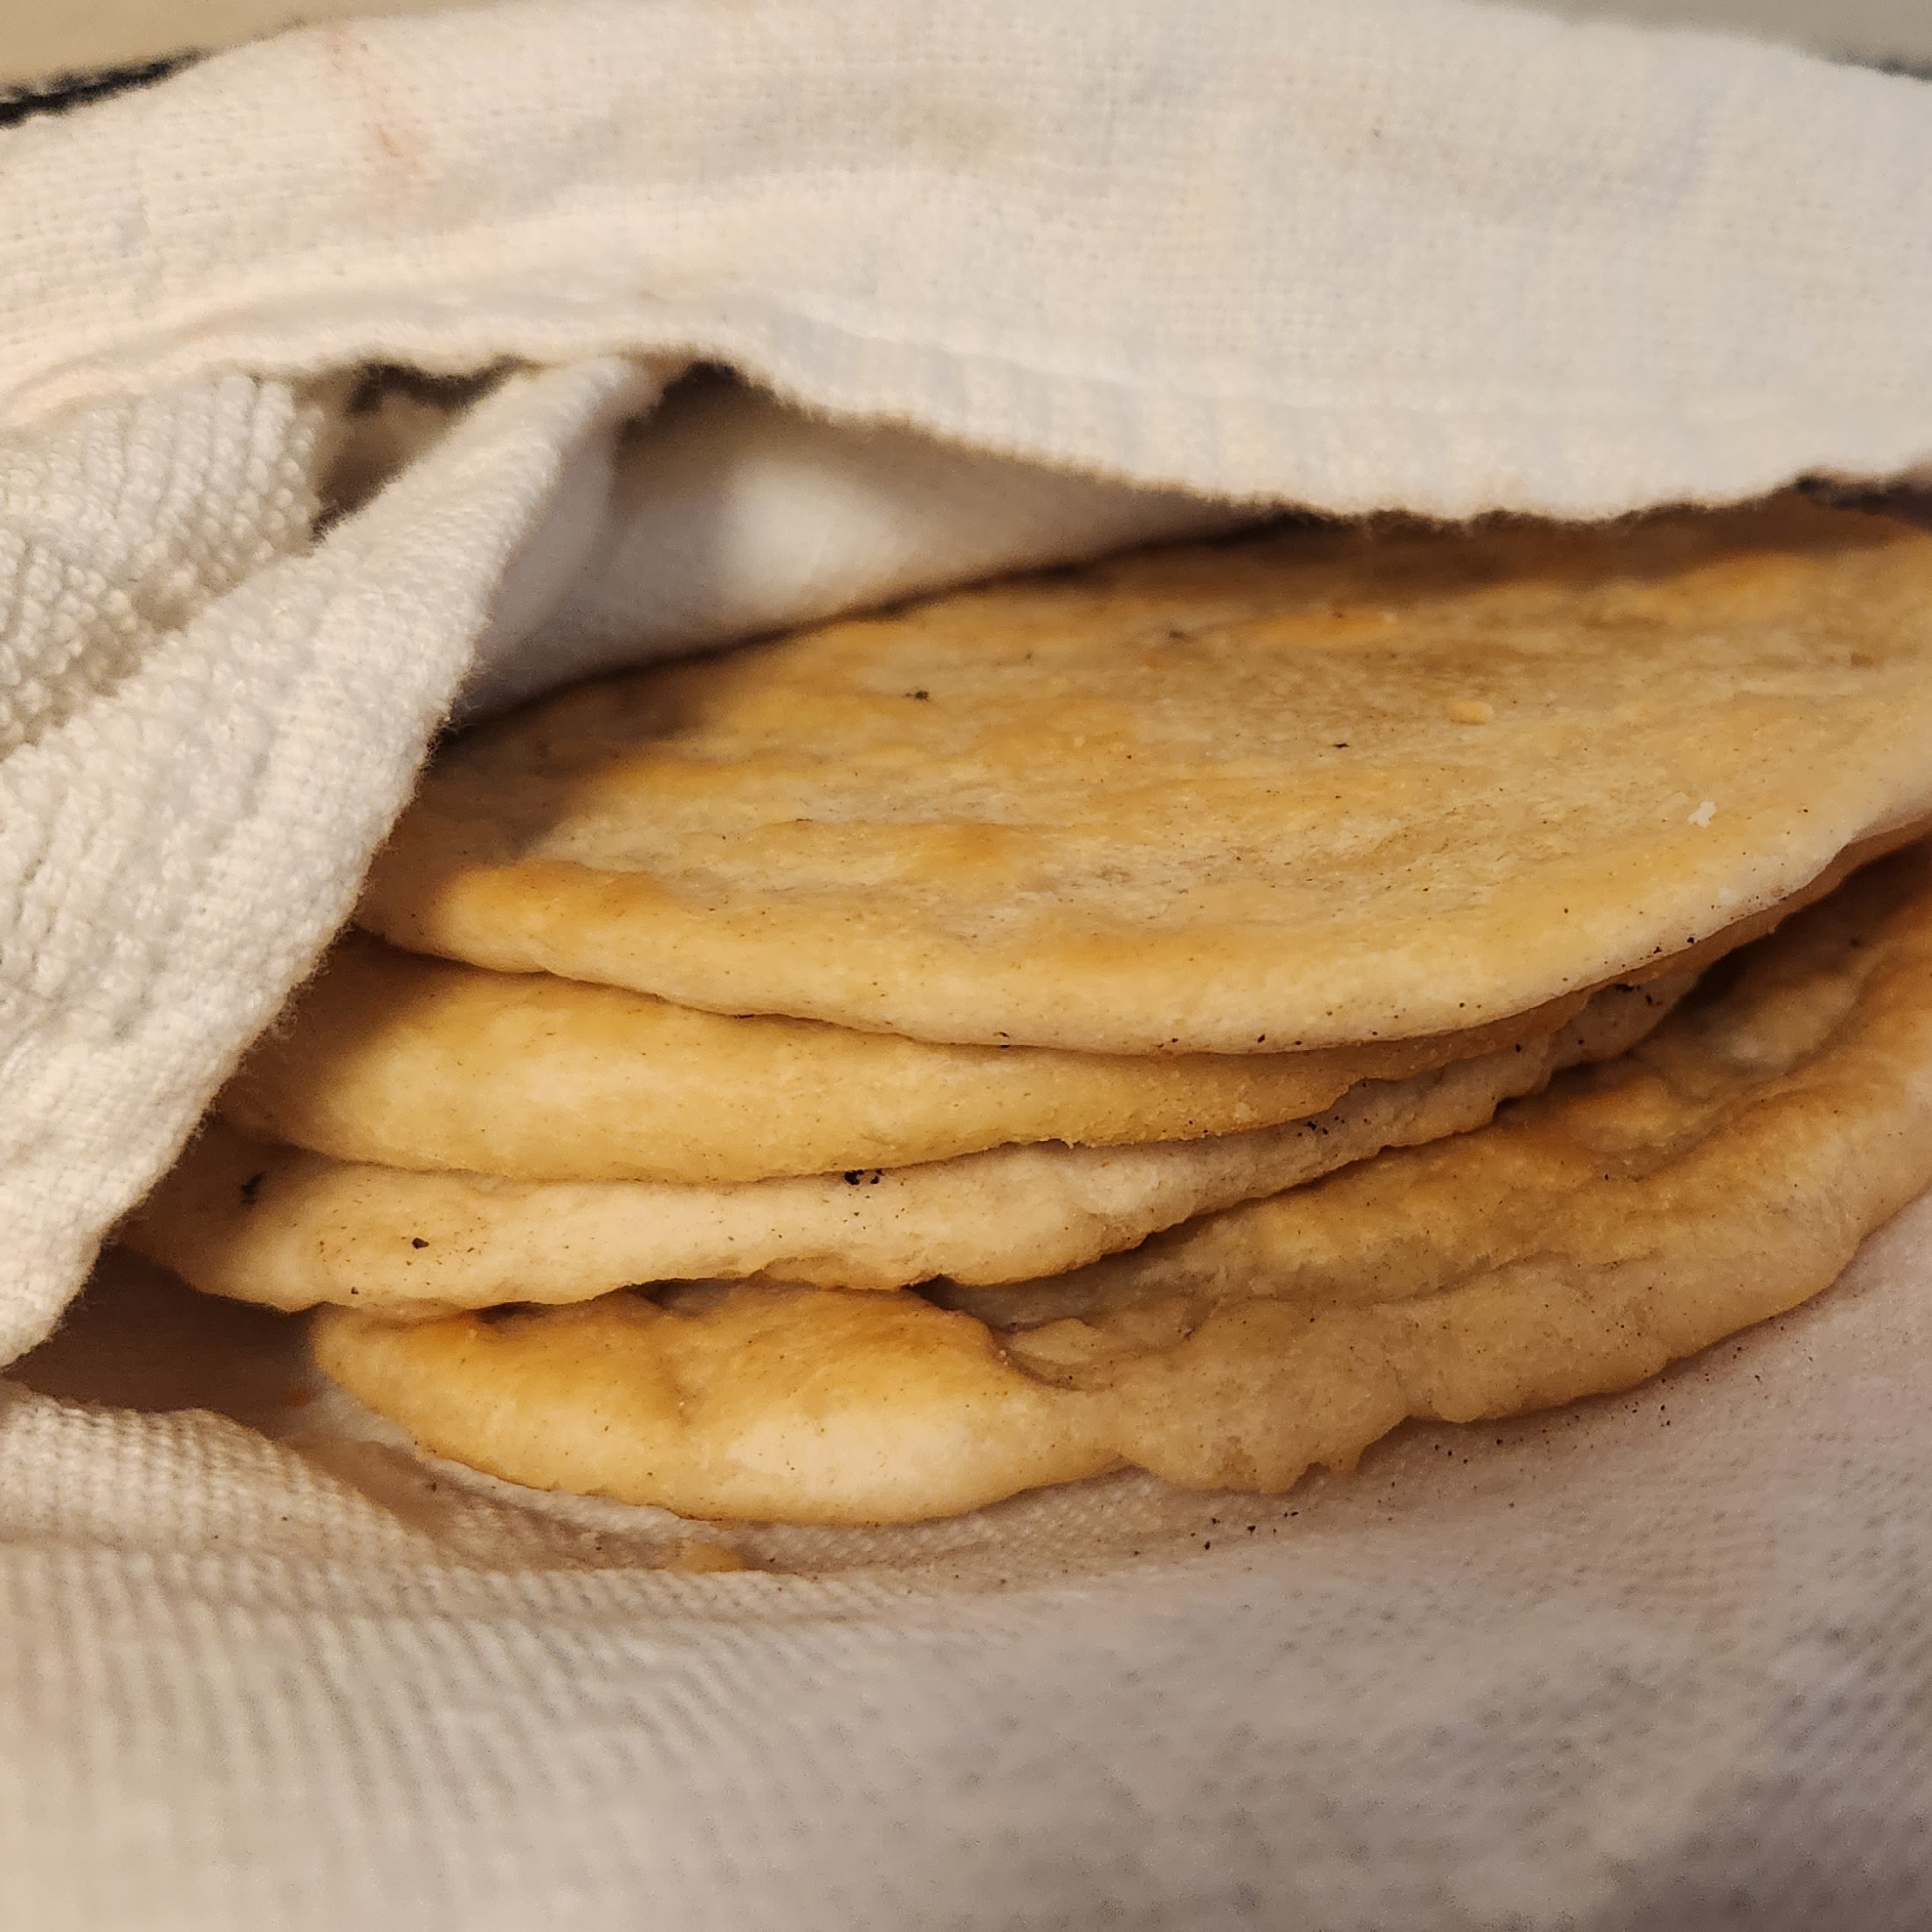
Flat Bread
A fast flat bread recipe that can be used for many meals.
Ingredients:
- 2x cups All-Purpose Flour
- 1 ½ tspn Baking Powder
- 1 tspn Fine Sea Salt
- 2 tbspn Olive Oil
- 2 tbspn Avacado Oil
- 1 tspn Sugar
- ¾ cup Cold Water
Steps
-
Make the dough
- Whisk the flour, baking powder, and salt together.
- Make a divot, a well, in the middle of the mixture.
- Pour 2 tbspn olive oil, the sugar, and most of the water into the well.
- Fold the wet ingredients into the flour slowly with a rubber spatula.
- As the dough comes together, add a bit of water or flour so it's not too sticky and not too dry.
- Once the dough is together, move it to a floured surface and kneed it til smooth.
- Cover with a dish towel and leave for 10 minutes.
-
Cook the Flat Bread
- Heat up a pan to medium heat.
- Divide the dough into six pieces.
- Roll into a disc that's between ⅛" and ¼" thick.
- Throw down the 2 tbspn avacado oil once the pan is hot.
- Place the flatbread in the oil and cook until golden brown on one side then flip and cook the other side. Should be 1 to 2 minutes each side.
- Transfer the cooked flatbread to a plate and cover with a dish towel to keep warm.
- Repeat for the other 5 flatbreads.
- Enjoy!
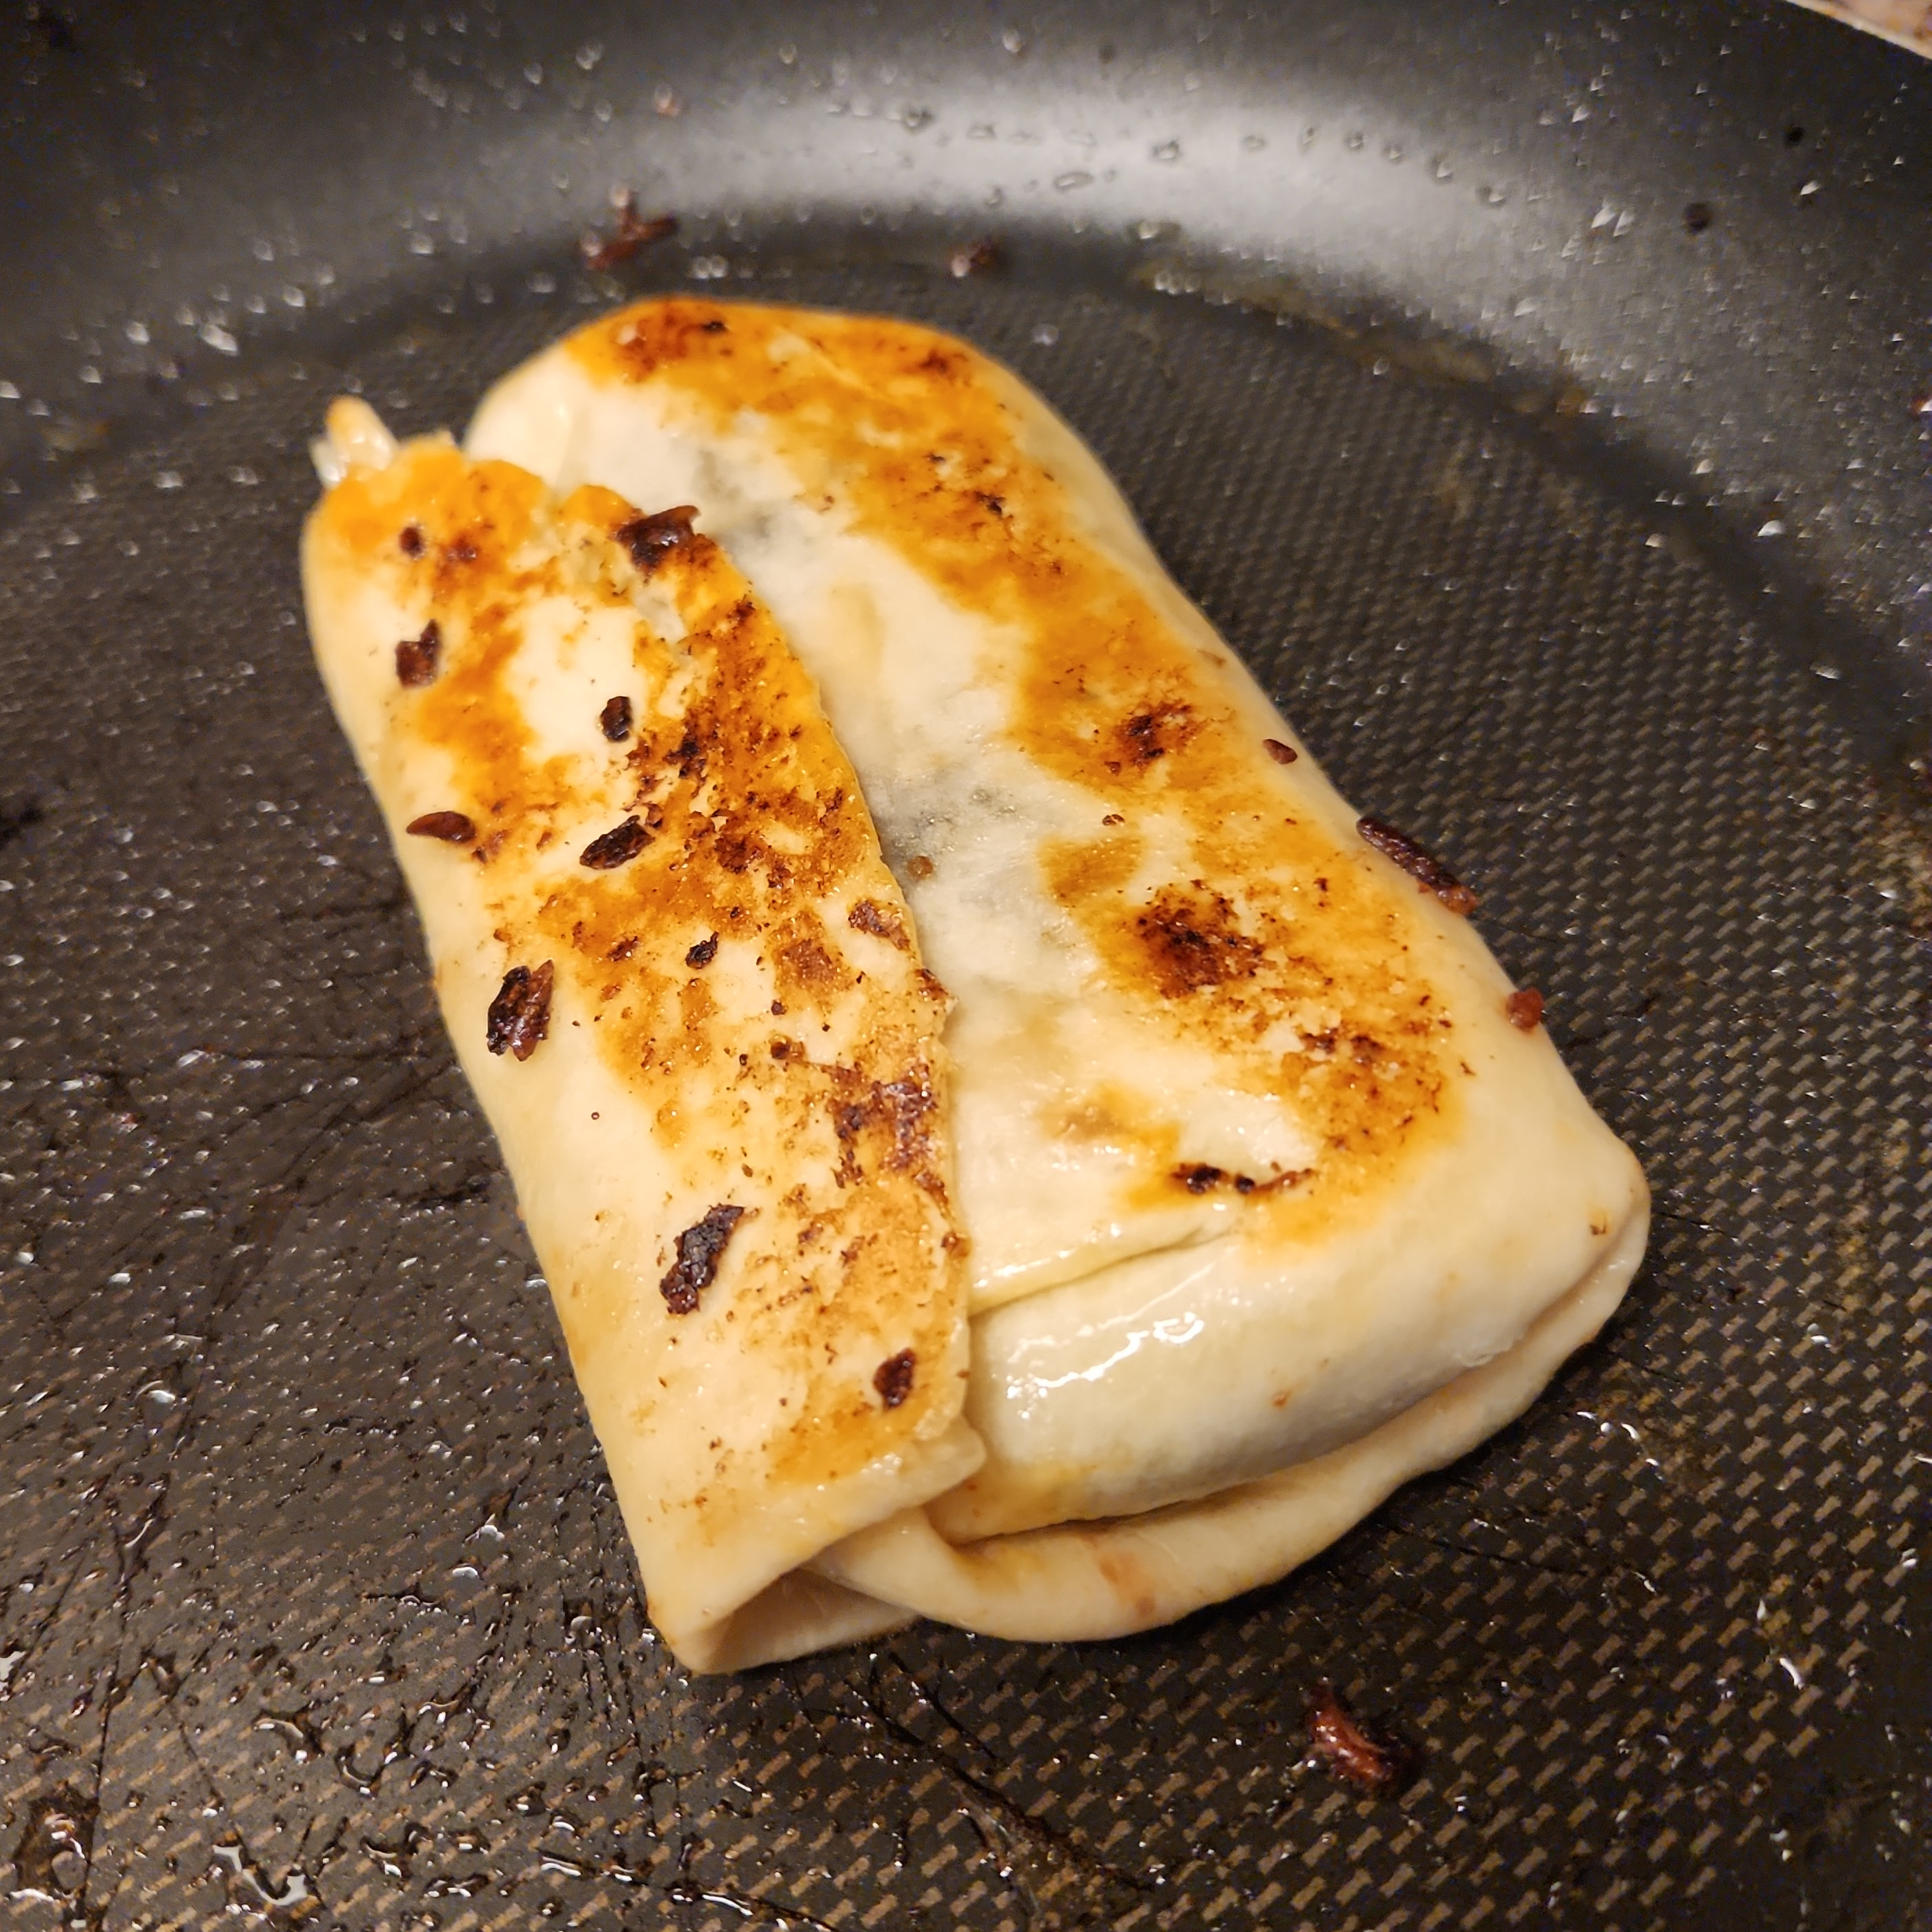
Honey-Glazed Stuffed Burrito
Filled to the brim with spicy fried rice with veggies, cheese, chicken, sriracha, and ranch and crusted over with a honey glaze, this burrito is like nothing you've ever had before!
Ingredients:
- 6oz Frozen Chicken Fajitas
- 2 tbsp Avacado Oil
- 1x Burrito-size Tortillas (≥ 9")
- 1x Green Bell Pepper
- 2x Red Bell Pepper
- ½ Sweet Onion
- 1 cup White Rice
- 1.5 cups Water
- 1x Rice Cooker
- 1 tsp Salt
- 1 tbsp Ground Black Pepper (or to smell)
- 1 tbsp Garlic Powder (or to smell)
- 1 tbsp Chipotle Chili Poweder (or to smell)
- 1 tsp Ground Cayenne Pepper
- 1 handful of fresh cilantro
- 1 handful Shredded Mexican Cheese
- 1 tbsp Raw Honey
- 1 tsp Sriracha
- 1 tbsp Ranch Dressing
Steps
-
Make the Rice
- Wash your rice. Poor some water in with your cup of rice and stir. Rinse and repeat until water is clear after stirring. This is too remove starch from the rice. It is very important for good rice!
- Add the 1.5 cups of water to your rice in the rice cooker.
- Dice the bell peppers and onions and throw into the rice cooker and stir well.
- Add the salt, pepper, garlic powder, chili powder, cilantro, and cayenne pepper into the rice cooker, and stir well. Make sure the rice is on top, below, and all around the veggies and covered in the seasonings.
- Start the rice cooker. Stir after rice is cooked.
-
Heat Up the Chicken
- Heat up a small frying pan on low-medium heat and grab a lid for it.
- Once the pan has fully heated, add your oil and allow it to start simmering.
- Place your fajita strips in the oil and cover for 3 minutes.
- Flip the fajita strips over, cover, and cook for 2 ½ minutes.
- Remove chicken from pan.
-
Assemble the burrito
- Throw down your sriracha and ranch across the middle of the tortilla.
- Add a scoop of rice on top.
- Add your chicken on top of that.
- Add your cheese on top of that.
- Spread your honey around the top lip of the tortilla.
- Fold the tortilla into a burrito. Bring the left and right sides in, then roll from the bottom, so that the honey lip folds over, sealing the burrito shut with its stickiness and able to fall out.
-
Glaze and Crispen the Burrito
- Heat up a large pan on high.
- Add a tiny bit of avacado oil.
- Throw burrito in, honey-side down.
- Fry that side of the burrito. The honey will drip out and form a glaze. Should take no more than 30 seconds.
- Flip and fry the other side. Should take no more than 15 seconds.
- Enjoy!
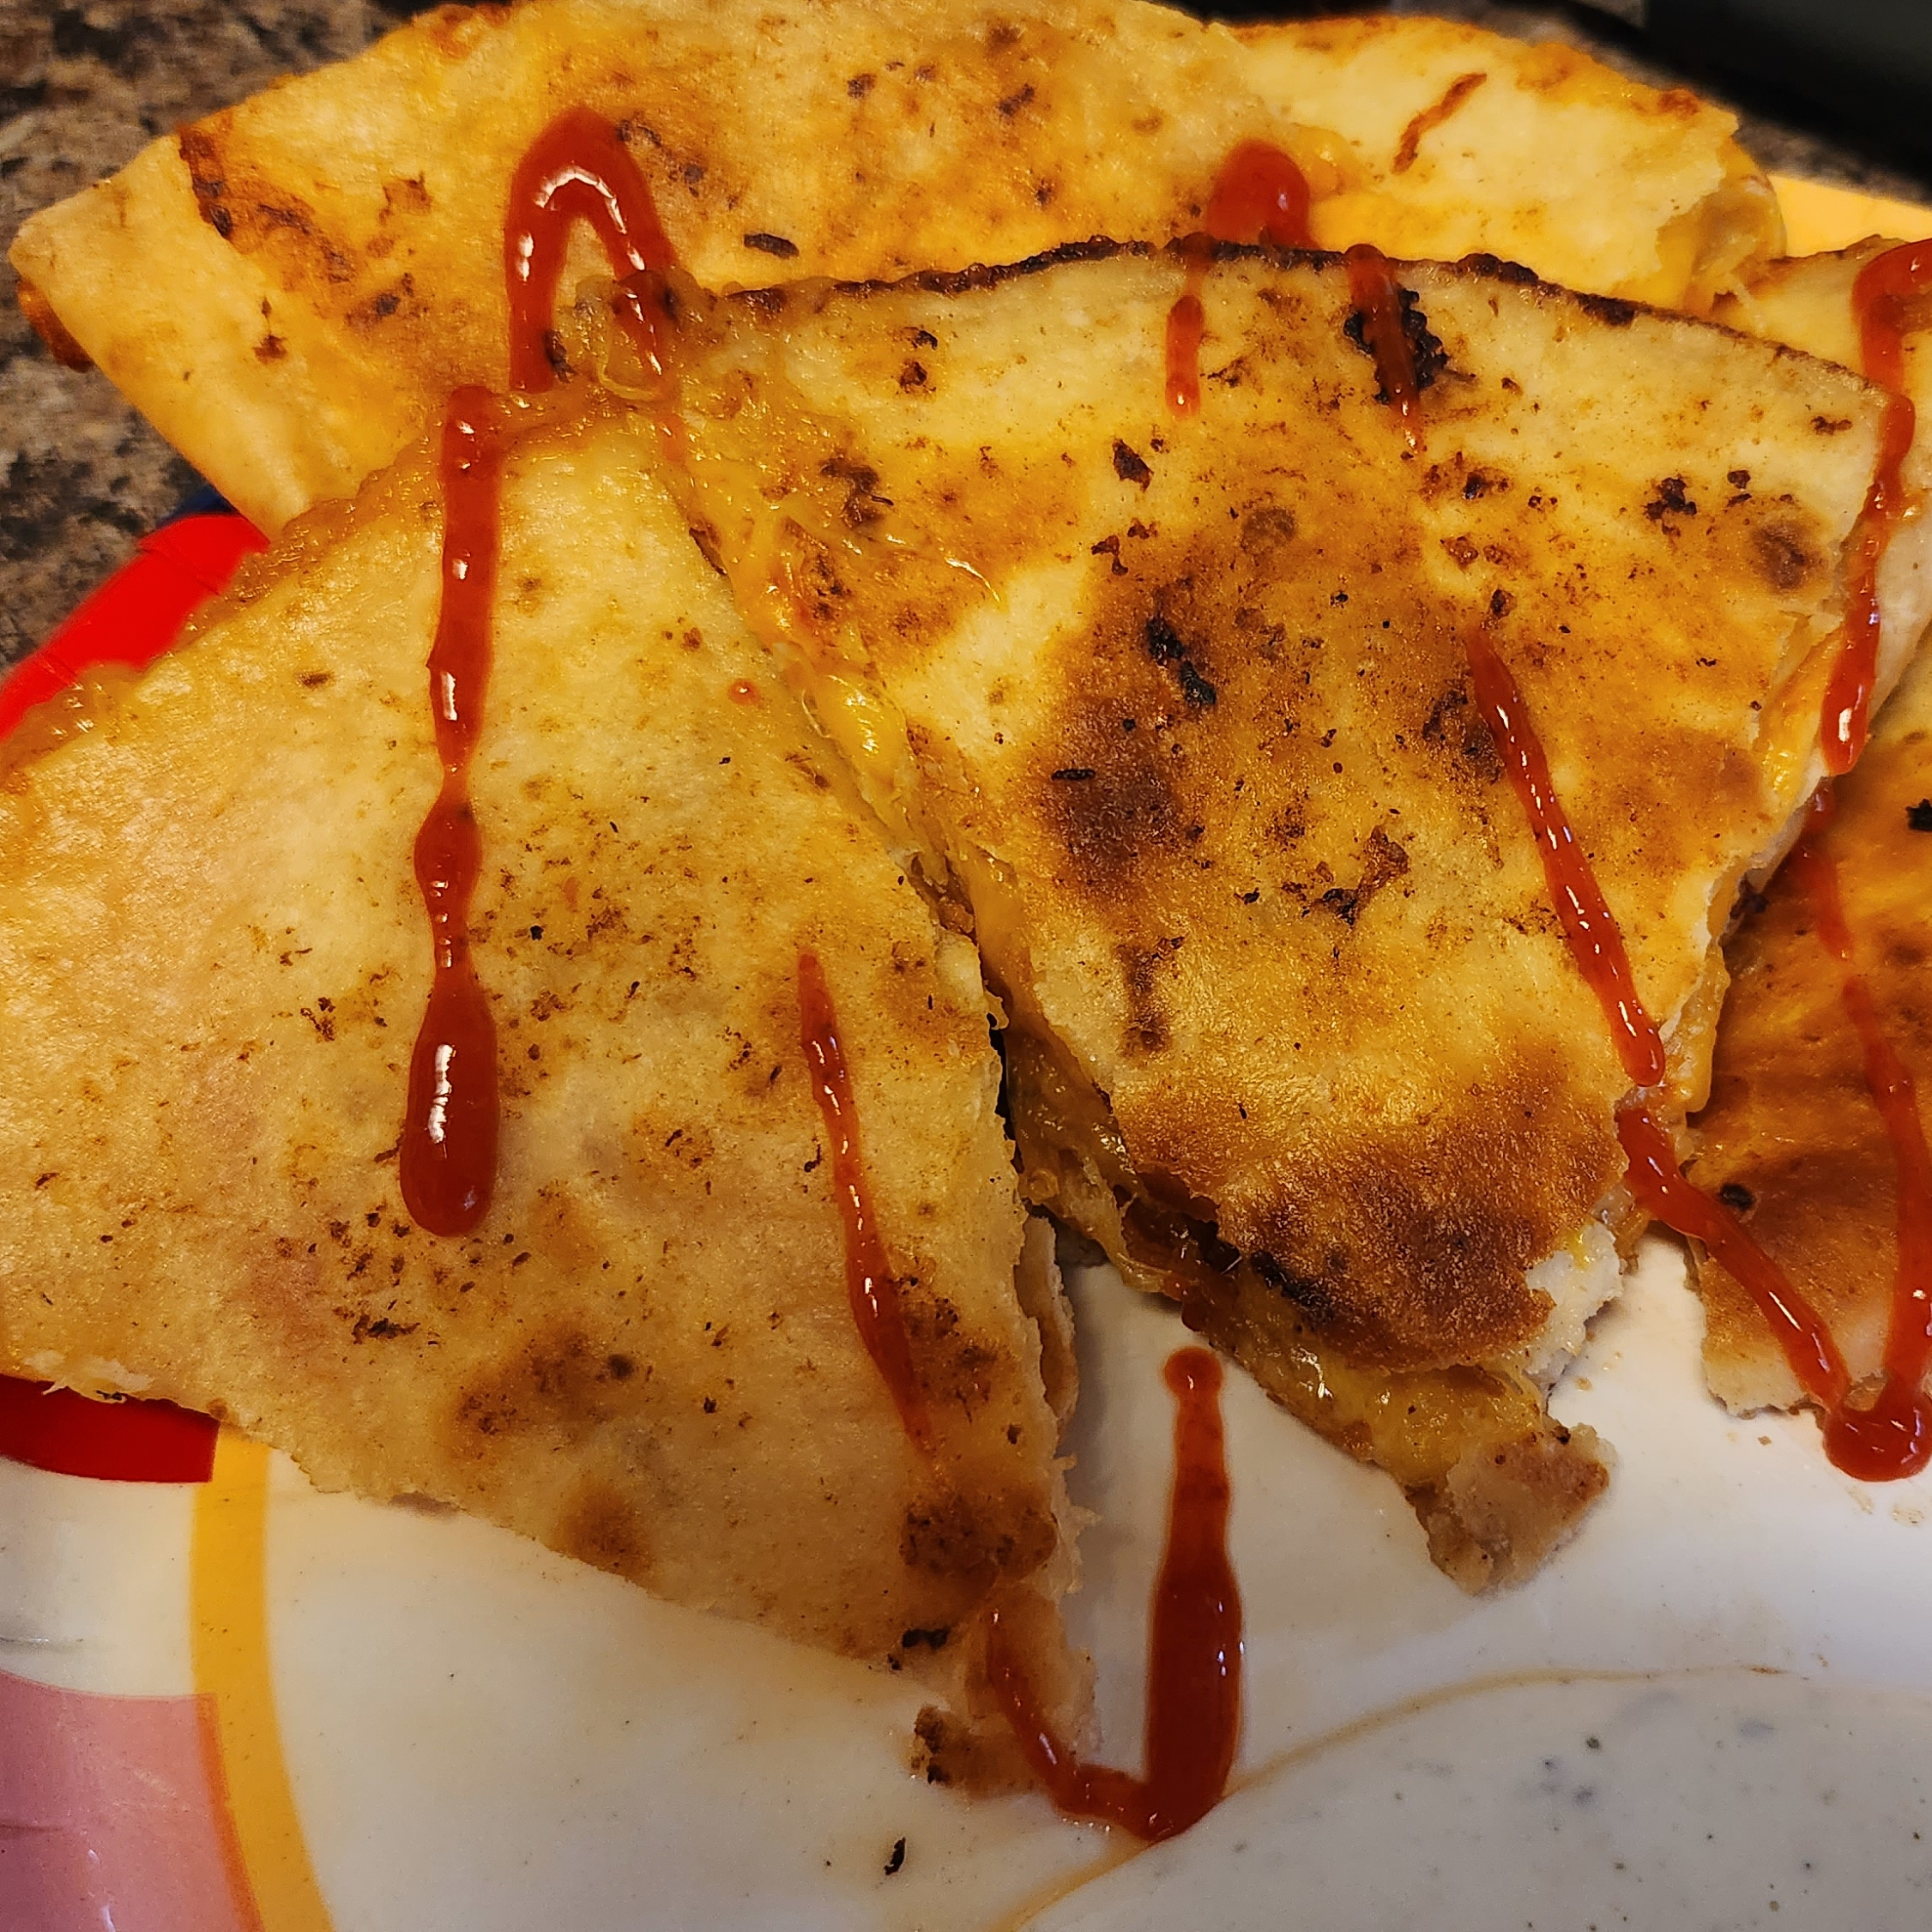
Honey-Glazed Chicken Quesadillas
Top-notch quesadillas made easy. Chicken, cheese, sriracha, and delicious honey mix for a perfectly simple quesadilla. Dip in a side of ranch dressing for a tasty meal!
Ingredients:
- 6oz Frozen Chicken Fajitas
- 2 tbsp Avacado Oil
- 2x Tortillas (≥ 9")
- 2 cup Shredded Mexican Cheese
- 1 tbsp Raw Honey
- 1 tsp Sriracha
Steps
-
Heat Up the Chicken
- Heat up a small frying pan on low-medium heat and grab a lid for it.
- Once the pan has fully heated, add your oil and allow it to start simmering.
- Place your fajita strips in the oil and cover for 3 minutes.
- Flip the fajita strips over, cover, and cook for 2 ½ minutes.
- Remove chicken from pan.
-
Assemble the Quesadillas
- Throw down your sriracha on one half of each tortilla.
- Drizzle honey on the other side.
- Cover each tortilla with cheese.
- Place the half the chicken on one side each tortilla.
- Fold each tortilla in half.
-
Cook the Quesadilla
- Heat up a pan on medium low.
- Add the 2 tbspns of avacado oil after 5 min.
- Cook the two quesadilla halves for 3 minutes. We don't care if it gets crispy yet - just wanna get the cheese melting good.
- Turn up heat to high.
- Flip and fry the other side. Should only take a minute.
- Flip back and fry the original side.
- Serve. Cut the quesadilla into 6 pieces and serve with a small cup of ranch. Drizzle more sriracha on top.
- Enjoy!
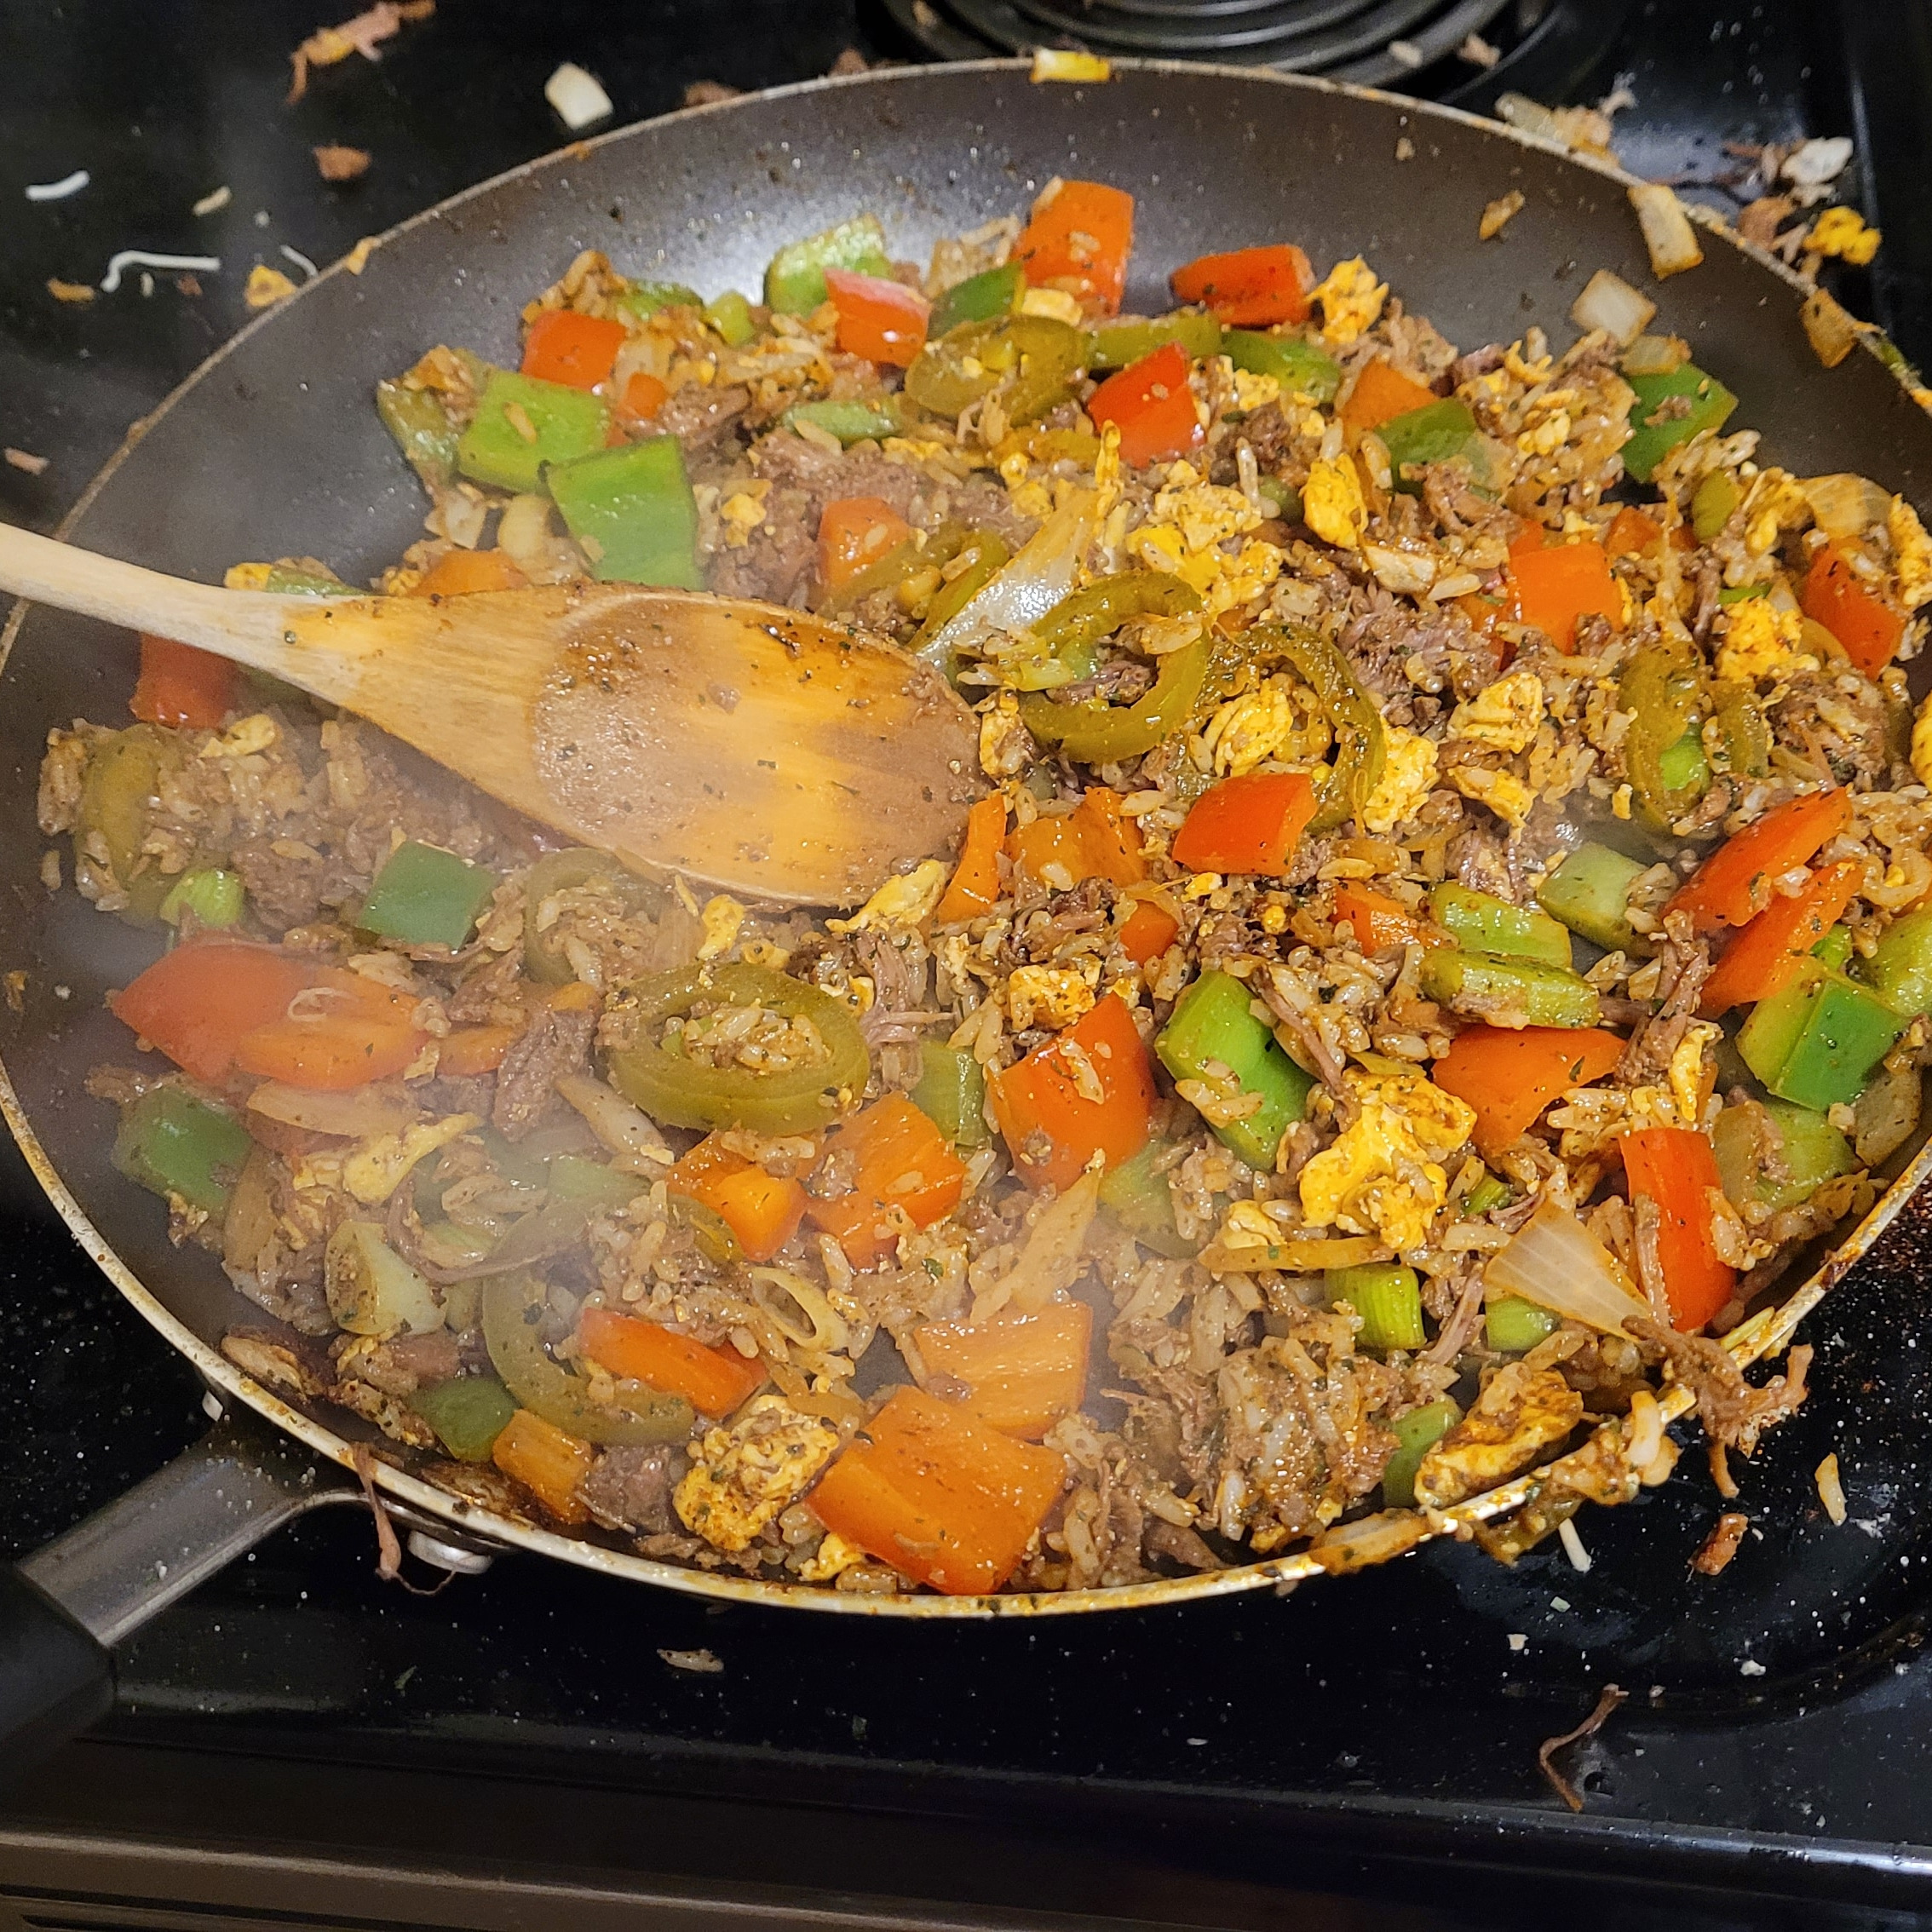
Japanese-Style Fried Rice
A spicy and delicious combination of veggies, rice, meat and eggs.
Ingredients:
- 1x Green Bell Pepper
- 2x Red Bell Pepper
- ½ Sweet Onion
- 1 group Green Onion
- ¼ cup Jalapeños
- 1 cup White Rice
- 1.5 cups Water
- 1x Rice Cooker
- 3 tsp Salt
- 3 tbsp Ground Black Pepper (or to smell)
- 3 tbsp Garlic Powder (or to smell)
- 3 tbsp Chipotle Chili Poweder (or to smell)
- 3 tsp Ground Cayenne Pepper
- 3 handfuls of fresh cilantro. (Really, for all the seasonings, it's just "as much as it takes to smell good")
- 1x can Canned Beef
- 2x Egg
- 2 tbsp Avacado Oil
- 2 tbspn Soy Sauce
- 1 tsp Sriracha
Steps
-
Cook the Rice (Day in Advance)
- Wash your rice. Poor some water in with your cup of rice and stir. Rinse and repeat until water is clear after stirring. This is too remove starch from the rice. It is very important for good rice!
- Add the 1.5 cups of water to your rice in the rice cooker.
- Start the rice cooker. Stir after rice is cooked.
- Freeze a day ahead.
-
Cook the Veggies
- Start letting the rice unfreeze.
- Scramble the eggs and season with salt and pepper for later.
- Dice the veggies. Place in large bowl.
- Heat up a pan to high heat.
- Season the veggies with the garlic powder, salt, pepper, cayenne pepper, chili powder, and cilantro. Don't use it all. You'll be using the seasonings throughout the cooking process.
- Once the pan is heated, pour the oil in and let it simmer and shine.
- Add the veggies and spread them out over the pan.
- Stir and stir and stir again. Until the onions begin to brown
-
Cook the Eggs
- Make room in the pan for eggs, and drain oil into the space.
- Poor scrambled egg into the oil and stir til cooked.
- Mix in with the veggies.
-
Cook the Beef
- Make room in the pan for the beef, and drain oil into the space.
- Mash apart beef to make a thinnish layer of it. Coat in the seasonings.
- Cook the meat, flipping to get both sides, until there is no pink.
- Mix in with the veggies and eggs.
-
Cook the Rice
- Make room in the pan for the rice, and drain oil into the space.
- Put one scoop of rice into the pan and spread into a single layer. Yes, only one scoop. Japanese style fried rice is mostly veggies and very little rice!
- Season the rice with the seasonings.
- Cook the rice for about a minute, then mix in with everything else.
- Stir til the rice begins to brown.
-
Fry
- Pour a pool of soy sauce into a space in the pan and drizzle the rest over the mixture.
- Stir stir stir until it's all fried.
- It will now disgustingly smell like Soy Sauce. Season the mixture with the seasonings until it smells good.
- Stir some more, let it cook for at least 3 minutes total.
- Move to a bowl. Add sriracha and stir it in.
- Enjoy!

Neapolitan-Style Pizza
A delicious yeasty dough topped with fresh pizza ingredients. If you want to make a pizza as close to the "right-way" at home without a pizza oven, here's how!
Ingredients:
- 1x Pizza Stone
- 765g Room Temp Water
- 2 tspn Active Dry Yeast
- 1275g Bread Flour
- ⅓ cup Olive Oil
- 4 tsp Salt
- 4 tsp Sugar
- Rao's Pizza Sauce (There's no need to make your own when Rao's is so good!)
- ½x Large Tomato
- 1x 8oz Sliced Fresh Mozzarella
- 4x Large Slices Pepperoni
- 1 handful Basil
Steps
-
Make the Dough (Day or Two Before Everything Else)
- Makes 8 Pizzas
- Add yeast to the room temp water in a large bowl, and set aside.
- In another large bowl, weigh out the flour.
- Add olive oil to the water and yeast.
- Pour flour into mixture and begin to hand mix.
- Add salt half-way through to avoid killing the yeast.
- Knead until reasonably together.
- Place into ziplock bag and seal.
- Place in fridge and wait to ferment for 12-36 hrs.
- After fermentation, cut into 8 pieces and place in an airtight container. They will last for up to a week.
-
Prep
- Preheat oven with Pizza stone inside to 550⁰F.
- Slice tomato.
- Set out one thing of dough for at least 2 hours.
-
Pound and Stretch the Dough
- Watch this great video on how to stretch the dough.
-
Assemble your Pizza
- Apply a generous amount of the Rao's pizza sauce to your dough.
- Place tomato slices on top of the sauce.
- Place the mozzarella on top of the tomatoes and sauce. Save a bit for later.
- Place the basil down now.
- Place the pepperonis down. Use that extra cheese to cover the basil a little so the pepperonis will stick when it melts.
-
Cook the pizza.
- Stick the pizza in the oven on the pizza stone, and cook until the crust rises and turns a golden brown (~10min at 550⁰ or ~15 at 500⁰).
- Enjoy!
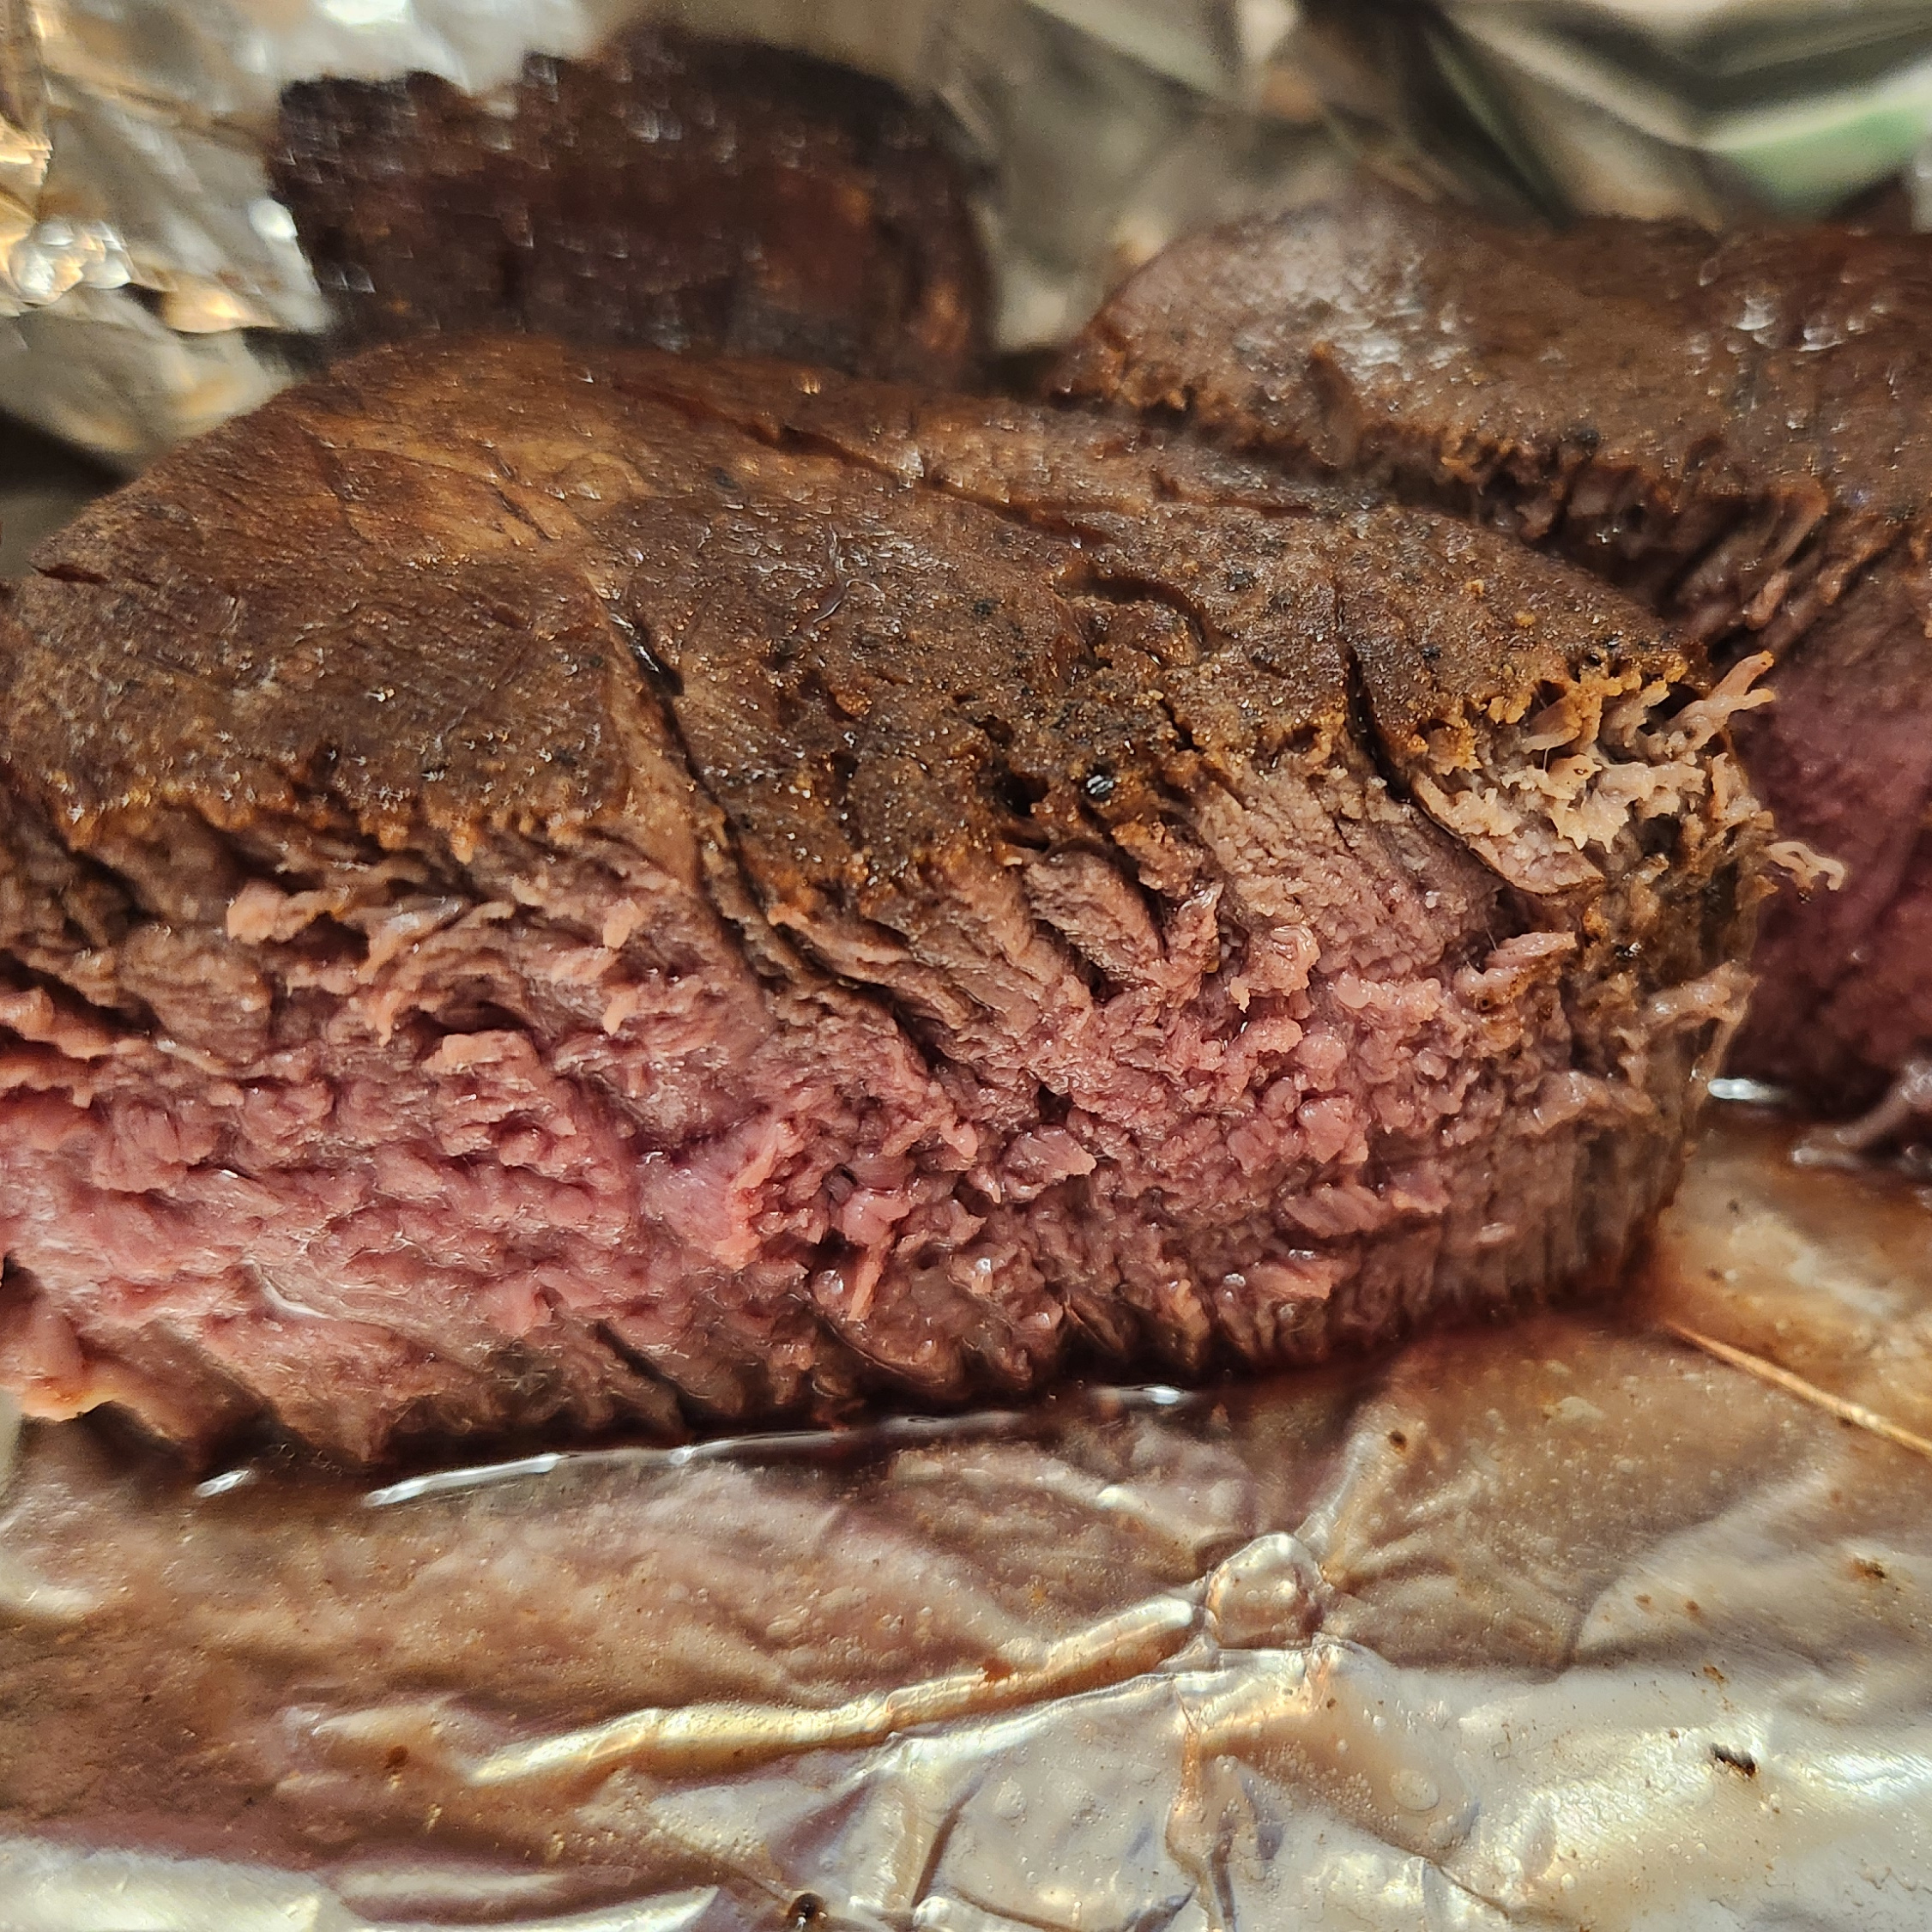
Steak
Nothing complicated. Just how to cook a good, thick, prime tenderloin at home. A steak method that leaves it so tender that it will tear in your fingers and can be cut with plastic.
Ingredients:
- 1x Center Cut 1½" Thick USDA Prime Tenderloin
- 1 tbsp Sea Salt
- 1 tbsp Ground Black Pepper
- ¼ tspn MSG
- 1 tbsp Lime Juice
- 4x Sticks Fresh Thyme (Yes, fresh! NOT GROUND!)
- 3x tbspn Butter
- 2 tbspn Avacado Oil
Steps
-
Prep the Meat
- Preheat the oven to a low temp, 250⁰F
- Let the meat achieve room temperature.
- Dry the meat well with a paper towel.
- Covering the meat with another paper towel, lightly hit the meat over and over again with the flat side of a meat tenderizer.
- Generously coat the steak with the salt, pepper, and MSG.
- Add ½ tbspn Lime Juice to one side of the steak. Rub it and the seasonings in generously.
- Add ½ tbspn Lime Juice to the other side and rub.
-
Cook the Meat Internally
- Place the steak on parchment paper on a baking sheet.
- Place the steak in the preheated oven and cook for 15min.
- Flip the steak over and cook another 10 minutes
- When you get to around 2 minutes left, begin heating a pan on medium high temperature.
- Check the temperature. You should be ~15-25⁰F below Medium-Rare (110-120⁰F). If not, give it another 5 min or so. If still not, do 1 minute increments.
- Remove from the Oven
-
Sear the Steak
- With the pan hot, pour in the avacado oil and allow to heat and shimmer.
- Place the steak in the oil. Wait 3 minutes.
- With thongs, flip the steak over and cook another minute.
- Add the butter around the steak and the time. Once melted, begin basting.
- Baste and cook for another minute and check the temp. Cook and baste until at medium-rare (135⁰F).
- With thongs, flip the steak to its side and sear the edges.
- Let the steak soak and finish tenderizing for 5min while wrapped in foil.
- Enjoy!
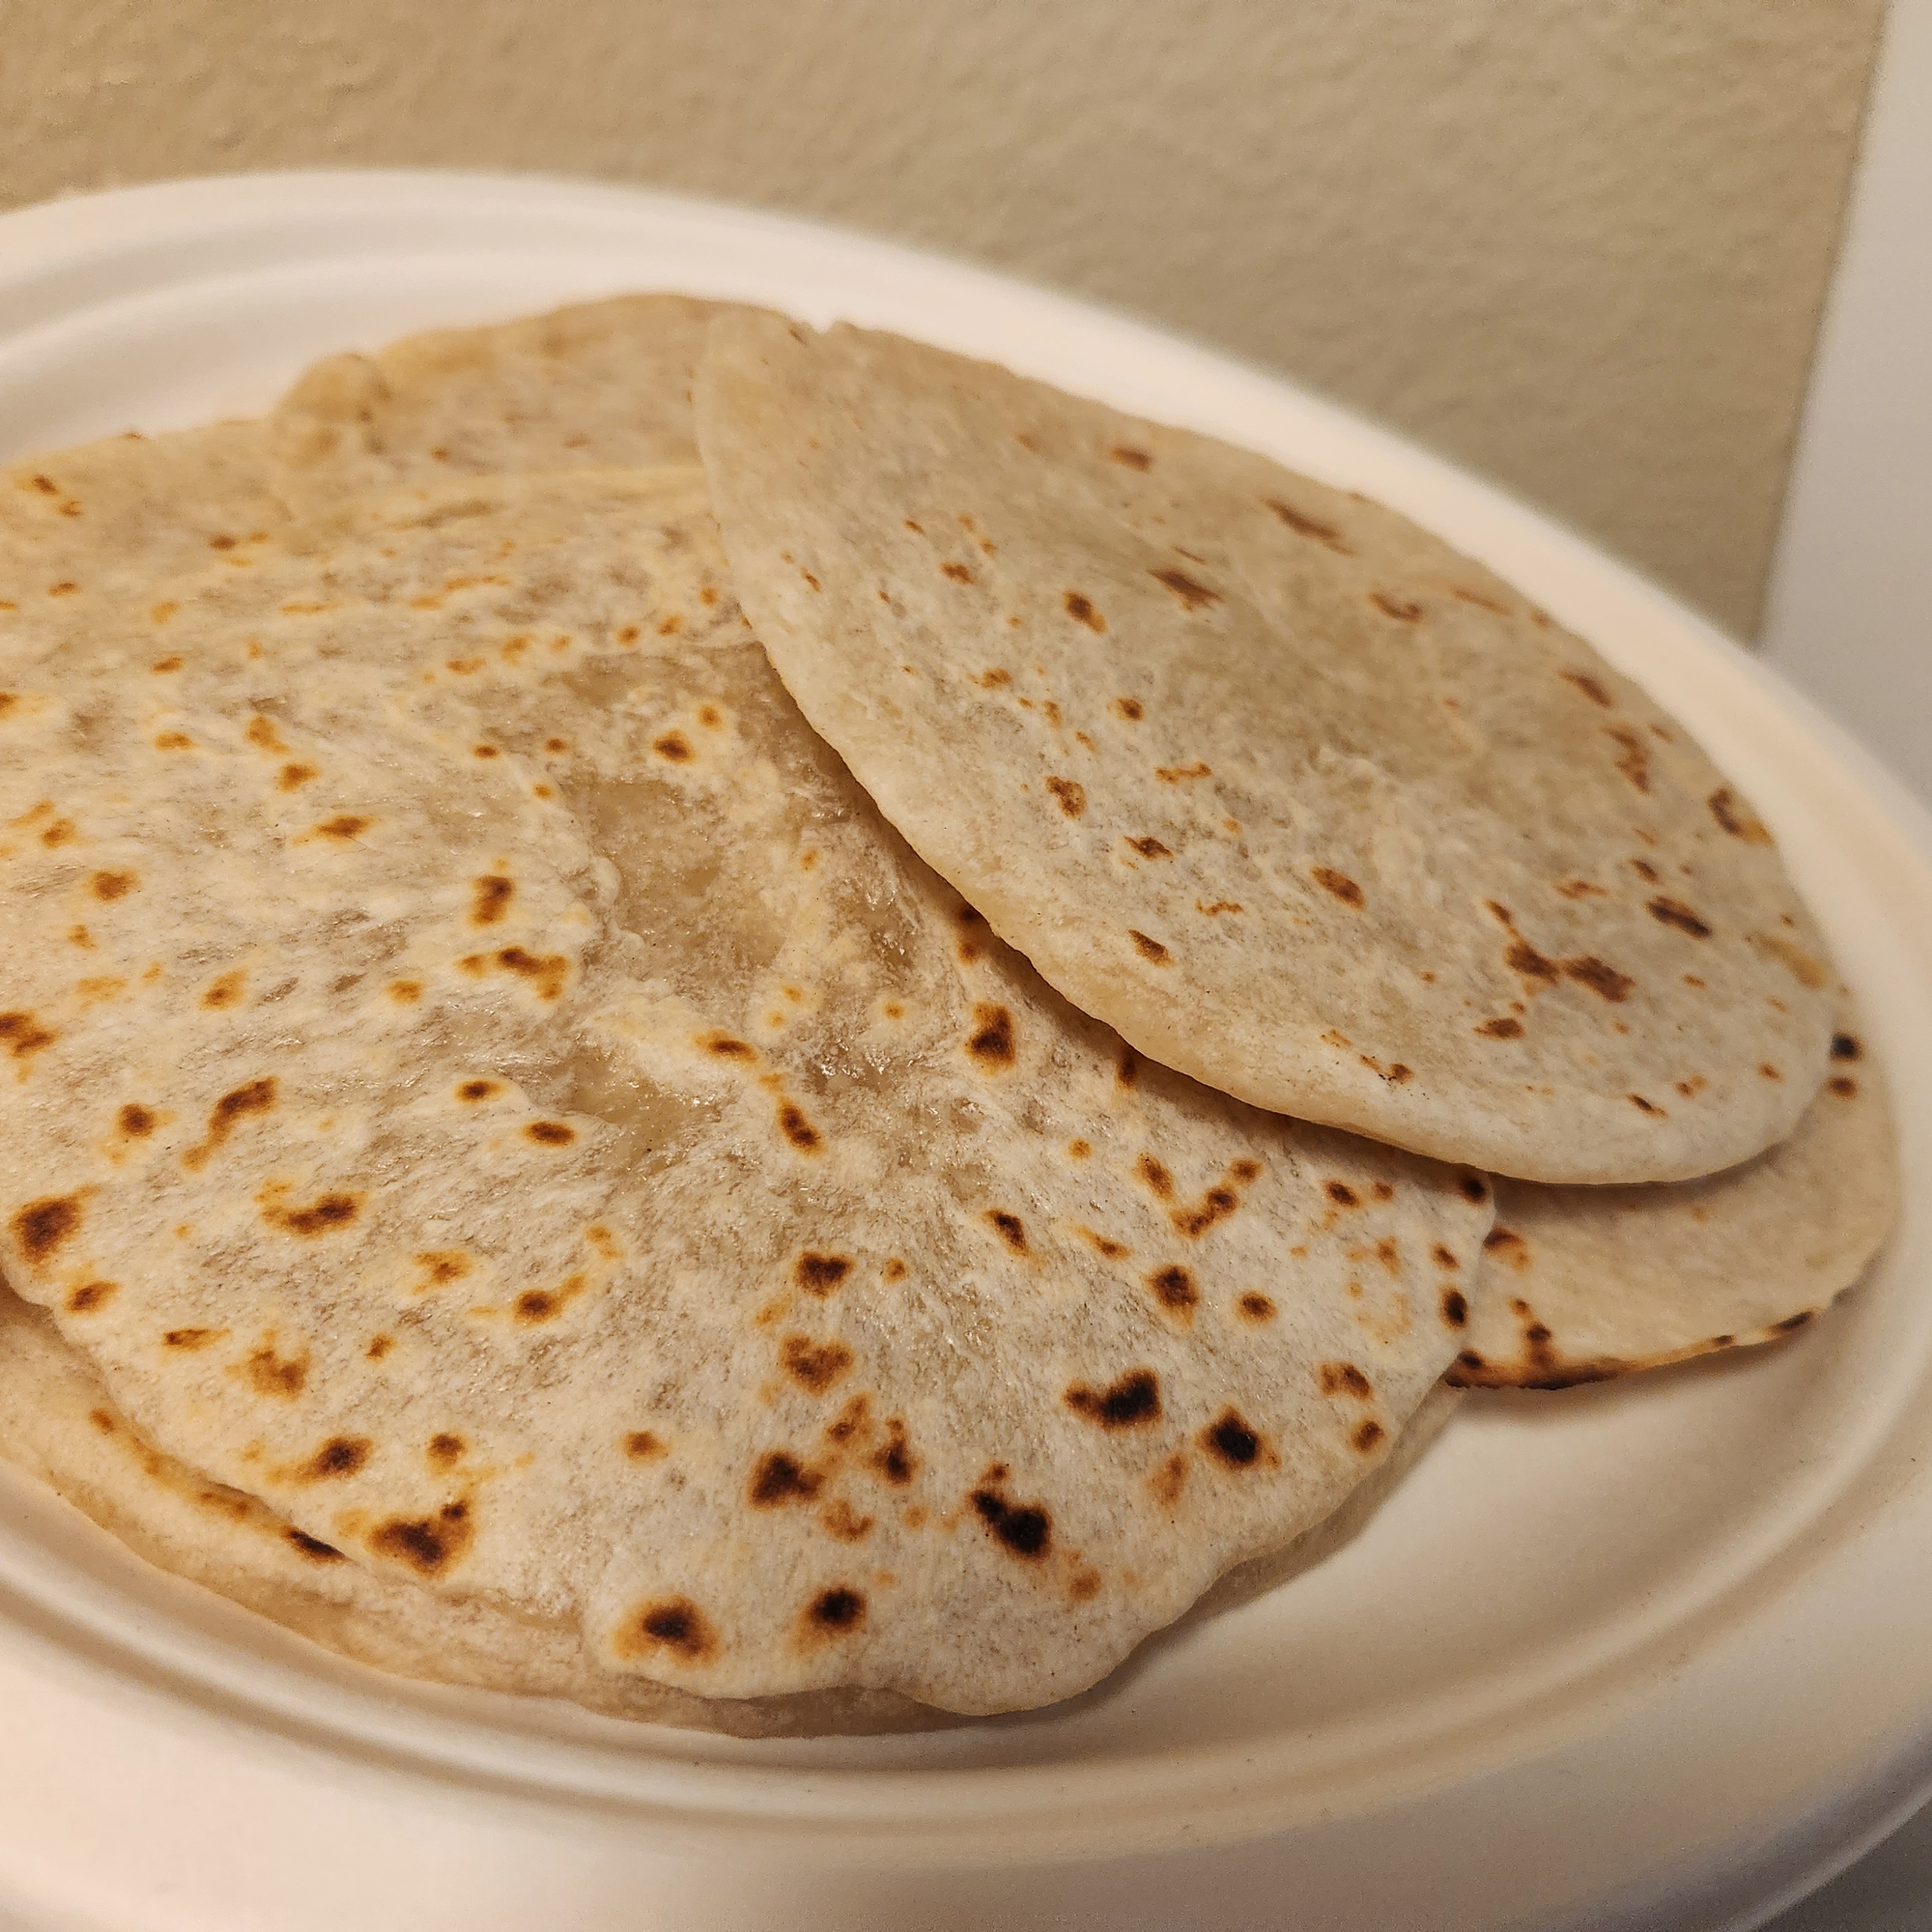
Tortillas
A bit different than the flatbread, these tortillas can really go with anything: tacos, wraps, on their own, and more.
Ingredients:
- 3 cups All-Purpose Flour
- 2 tspns Baking Powder
- 1½ tspns Kosher Salt
- 5 tbsps Salted Butter (Room Temperature)
- 2 cups Hot Water
Steps
-
Make the Dough
- Mix flour, baking powder, and salt.
- Add butter.
- Make a well and add 1 cup Hot Water.
- Fold the mixture over the water beginning to form dough.
- Add the rest of the water and continue to stir.
- Once together, pull out and place on a floured surface.
- Begin to kneed dough in your hands, periodically adding flour until it just barely doesn't stick to your hands.
- Place dough ball under a damp cloth for 10 minutes.
-
Make the Tortillas
- Begin to heat a pan over medium high heat.
- Once hot add a small drizzle of oil.
- Cut the dough into 12 even wedges and roll them into balls.
- Use a rolling pin to roll out a ball. You may have to roll out, wait, then roll again, to really make sure the tortilla stays stretched.
- Cook the tortilla in the pan for about 30-60 seconds, until little bubbles appear.
- Flip and cook another 30 seconds until the bottom is slightly golden.
- Set on a plate and cover with a towel.
- Repeat with all the dough.
- Enjoy!